|
Probably the most annoying part of
reassembling the trigger group also happens to be
the first step. If we have been brave or foolhardy
enough to have removed the Clip Ejector Spring then
we must first put it back in place.
The goal of this step is to get
the rounded eye of the spring over the post pictured
on the right, while also getting the bottom of the
spring to nestle itself in the recess on the left.
As you can see in the
photo below there is a little piece of metal (left)
that you must bend the bottom of the spring over
while keeping the eyelet of the spring on the post
(right).
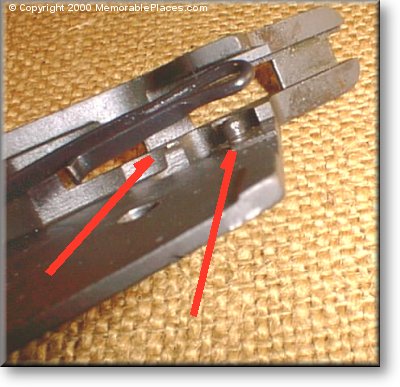
If the raised nub on the left is worn down
or is rounded (as it can be on older trigger housings)
then keeping everything in place is a trick that
requires 3 hands or some patience.
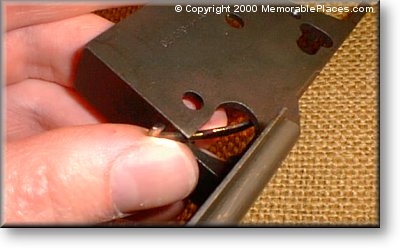
Start the assembly process by threading the
Clip Ejector Spring through the hole in the front
of the trigger housing. The angled part of the spring
should point out toward the left of the housing.
Hold this in place with my thumb. or another finger
during the balance of the operation.
The trick now is to pull up on the eyelet
end of the spring while keeping the spring from
rolling or turning and place it over the post in
the rear inside of the trigger guard while at the
same time lifting the middle of the spring up over
the raised portion shown in the above photograph.
Once the Clip Ejector Spring gets into position
it will naturally snap nicely into place.
There are times where everything will just
work great though and POP it will snap right where
it is supposed to go! More often than not however
it will want to bend and twist out of position before
it ever gets there.
One neat little trick that has helped particularly
when we have a worn trigger housing or the bottom
of the spring wants to slide out. It is illustrated
below.
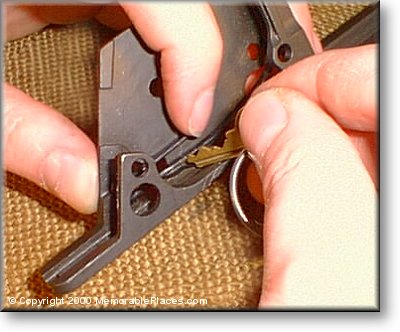
The idea is to find a BRASS key with an angle
on the front tooth of about thirty degrees. Use
this to lever the spring up and into position and
then by tilting the key to allow the spring to slide
off and come to rest right where it is supposed
to ride.
When the spring is in place it will be pretty
obvious as it will snap snugly against the left
side of the trigger housing.
After fighting with the Clip Ejector
Spring reattach the Trigger Guard. This is a simple
process.
Next Page

|