|
Be reticent to remove the Rear Handguard
for fear of cracking it upon removal or replacement.
The first step that
in replacing the Rear Handguard is to drop the handgrip
itself into position. Note how we put the front
of the handgrip into the rear portion of the Rear
Band. Then - rotate the Rear Handguard down and
snap it into place in between the Receiver just
where it meets the barrel and the Rear Band.
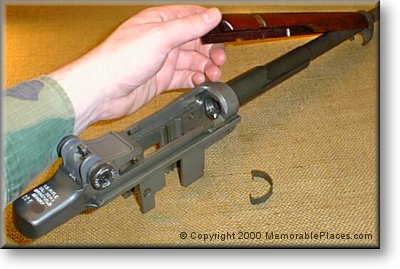
Having completed the
easy part, we now turn my attention to the Rear
Handguard Band.
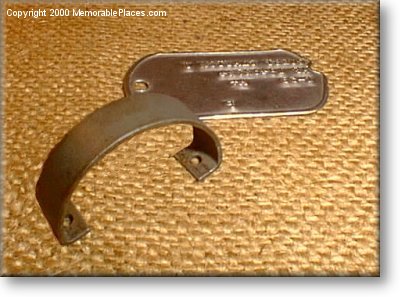
It is important to
note that, (despite its roughly half circle shape
as shown above), the Rear Handguard Band is not
symmetrical. This is important as the 'longer' end
of the band must be attached on the left side of
the rifle.
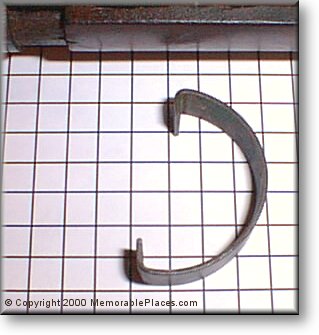
We have found that
if we have trouble discerning which end is longer
it is simple enough to do by laying the band on
graph paper (in this case 1/4 inch squares) and
aligning the bent portions parallel to the vertical
lines. Note the obvious overlap.
When we have determined
which end of the band is which,we place it on the
stock
Next Page

|