|
When all of the parts are in place
it is time to pin the assembly together. Generally
this isn't much of a struggle.
One little trick that makes alignment
of the parts much easier is to take the pressure
off of the Operating Rod Catch by depressing the
Clip Latch. By depressing the Clip Latch on the
outer left part of the receiver, we can relive all
of the spring tension on the assembly. This truly
makes lining the parts up much more simple.

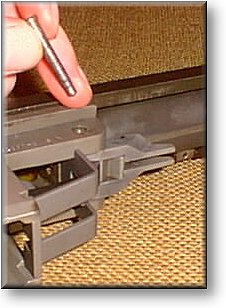
When all of the parts
are lined up the Follower Arm Pin is inserted from
the right side of the receiver. The pin is threaded
through the holes in the Follower Arm and Bullet
Guide and then into the other side of the Receiver.
It should come to rest flush against the receiver
leg.
Now that the lubricant
wont be in the way, grease the 'swollen' part of
the barrel where the Operating Rod will ride.

Having completed
most of the assembly, all that is left to finish
up is to put the Operating Rod Spring and the Follower
Rod in.
Next Page

|

