|
The hardest part of assembly is over
and now it is time to replace the Operating Rod
Spring. As noted before always wear some sort of
eye protection when working on an M1.
Before putting the
Operating Spring in reattach the Follower Rod. Many
of the M1 Springs the springs are 'necked down'
on one end. This is the end that we thread the Follower
Rod into.

Push the spring up
as far as it will go - to the raised nubs on the
follower rod.
Take a few minutes
to very lightly oil the spring to help keep corrosion
down. Also oil the Follower Rod Except for the 'fork'
end.
When the parts are
lubricated insert the spring into the Operating
Rod. The end of the spring without the Follower
Rod goes in first of course.

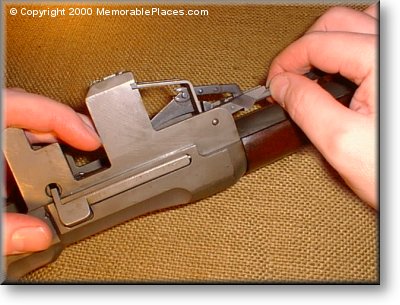
When the spring is
in as far as it will go easily, grab hold of the
Follower Rod and compress the spring as far as it
needs to be so that you can thread the Follower
Rod through the front of the Operating Rod Catch
and the Bullet Guide.

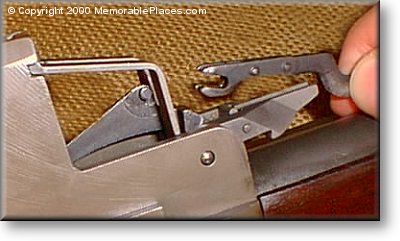
In order to hook the
Follower Rod to the Follower Arm, lift the tail
end of the Follower Arm with one hand while guiding
the Follower Rod with the other until you can fasten
the 'forks' of the follower rod around the posts
on the Follower Arm.
When you have everything
hooked up slowly release pressure on the Follower
Rod and make sure that everything remains stable.

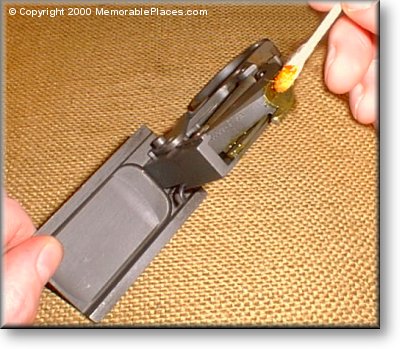
That completes the
assembly of the Feed Assembly, but since this is
usually the last assembly that needs to be put together
before we reassemble the rifle in total, take a
few moments to grease the trigger group. Any surface
that cams or comes into contact with any other sliding
metal surface gets a little coating (with the absolute
exception of the trigger and sear which never get
any lubrication whatsoever).


|

